Your cart is currently empty!
Category: Recipes
A list of various recipes using red and green Hatch chile from New Mexico. This is a great source for information about cooking New Mexico cuisine, including tamales, posole, enchiladas, chile rellenos, green chile cheeseburgers, and more.

Hatch Red Chile Pork Tamales: A New Mexico Kitchen Adventure
How to make Tamales
The aroma of Hatch red chiles mingling with savory pork and warm masa is pure New Mexico magic. Making tamales takes time and effort, but the results – flavorful bundles of tradition – are well worth the reward. They’re perfect for gatherings or freezing for future feasts. Here’s your expanded guide to creating these delicious culinary treasures.
The Masa: Heart of the Tamale
- Dried Masa Harina:
- Follow the package instructions as a starting point for the water-to-masa ratio.
- For a richer, softer masa, beat in lard or vegetable shortening. Using a stand mixer or electric beaters makes this process much easier.
- Enhance the flavor by swapping some of the water for warm chicken or pork broth.
- Season generously with salt! The masa makes up a significant portion of the tamale’s flavor profile.
- Check for doneness: A small ball of masa should float in a cup of hot water.
- Frozen Prepared Masa:
- Thaw overnight in the refrigerator.
- If it feels too moist, add small amounts of masa harina or cornstarch until it reaches a manageable consistency.
- The flavor is typically pre-seasoned, but it may need an additional touch of salt.
The Red Chile Sauce: Fiery Soul of the Dish
- The Chiles: Use dried Hatch red chile pods for the most authentic, complex flavor. Lightly toasting them in a dry skillet will enhance their aroma. Rehydrate them in warm water according to our Crimson Chile Concoction recipe [include hyperlink to the previous recipe].
- The Base: Blend the rehydrated chiles with garlic, onion, cumin, Mexican oregano, salt, and pepper, ensuring a smooth, velvety consistency.
For more information, be sure to check out our recipe to make red chile sauce!
The Pork: Tender and Flavorful
- Cut: Pork shoulder or butt are ideal, cut into large chunks. Keep plenty of fat for optimal flavor and lusciousness.
- Season: Generously coat the pork with salt, pepper, cumin, and some red chile powder.
- Cook: Several methods work well!
- Braise slowly in a Dutch oven with a bit of your red chile sauce. This yields the most tender, flavorful pork.
- Use a pressure cooker (like an Instant Pot) for a faster process.
- For maximum caramelization, brown the chunks first, then simmer in the sauce until tender.
- Shred: Remove any bones and use two forks to shred the pork for a perfect tamale filling.
Assembly: Tradition in the Making
- Soak Corn Husks: Submerge dried corn husks in hot water until pliable. This can take anywhere from 30 minutes to a couple of hours.
- Spread the Masa: Aim for a thin layer (about ¼ inch) over the wider part of the husk. A masa spreader tool helps, but an offset spatula works as well.
- Fill and Fold:
- Add a generous spoonful of filling and a bit of sauce down the center of the masa.
- Fold the sides of the husk together, then fold over the narrower end.
- Secure: Use strips of soaked husk to tie the tamales for steaming.
Steaming: The Final Step
- A dedicated tamale steamer is ideal, but a large pot with a steamer insert works well.
- Arrange tamales upright, ensuring the open ends face up.
- Steam for 1-2 hours, checking water levels periodically to prevent scorching.
- Doneness: The masa should pull away easily from the husk.
Unwrap and Enjoy!
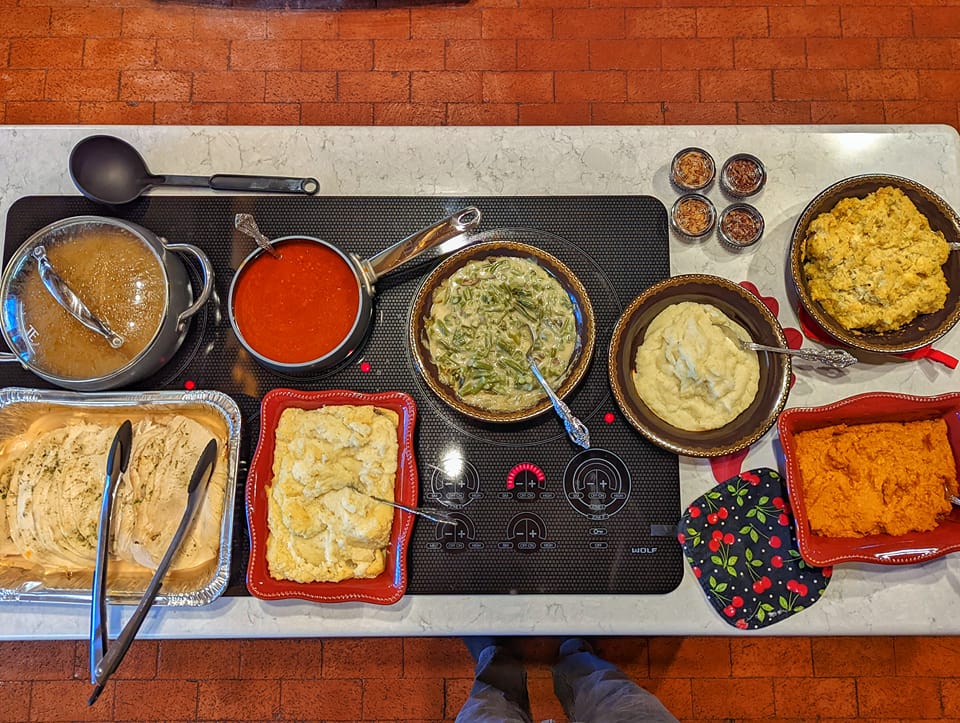
Savor the reward for your labors – savory, satisfying bites steeped in tradition. Serve your New Mexican red chile pork tamales with extra sauce, rice, beans, and your favorite accompaniments. If you have people over, keeping a pot of tamales on the stove is a great way to show some Southwestern hospitality.
Tips:
- Make a big batch – tamales freeze beautifully! Reheat by steaming them again, or microwaving on a medium setting.
- Enlist friends or family – tamale-making is a social event, and many hands make quicker and easier work. The best part is that everyone can have a full dinner, and take home some tamales for their effort too!
- Customize: Use your favorite red chile recipe, or swap pork for shredded chicken or a vegetarian filling. You can also use green chile sauce, or a lot of different fillings. In New Mexico, our favorite tamales are red chile and pork, but there are a lot of different types of tamales!
In case you are looking for other ways to use your red and green New Mexico chile, be sure to check out our recipes section!
- Dried Masa Harina:

Red Chile Sauce: A Study in Pure Flavor
The Heart of New Mexican Cuisine
In the Land of Enchantment, red chile sauce reigns supreme. It’s more than just a condiment; it’s a cultural touchstone, a fiery symbol of our state pride. The question “Red or Green?” echoes through New Mexican kitchens, and while we adore our green chile, there’s something undeniably special about the deep, earthy flavor of a well-crafted red chile sauce. Nearly every restaurant boasts its own secret recipe, a testament to the versatility and enduring appeal of this crimson condiment. If you want to make New Mexican food, this is our mother sauce, as important as Béchamel in French cuisine.
Red Chile Sauce Recipe
Ingredients
- 12-15 dried Hatch red chile pods (choose your own heat level)
- 4 cups water or chicken/vegetable stock, warmed
- 4 cloves garlic, minced
- 1/2 small onion, coarsely chopped
- 1 teaspoon salt
- 1/4 teaspoon freshly ground black pepper
- Optional: For extra heat, sprinkle in some other more spicy chile powder or blend in a hotter chile pod
- Optional: 1 ounce unsweetened dark chocolate, finely grated
- Optional: 1 teaspoon ground cumin
- Optional: 1/2 teaspoon dried Mexican oregano
Instructions:
- Revitalize the Chiles: Snip or break off the stems and shake out the seeds from your red chile pods. Give them a rinse to clean off any dirt or residue. Toast them briefly in a dry skillet over medium heat, just until aromatic. Barely submerge the chile in hot water, and simmer covered for 15-20 minutes until fully rehydrated and softened.
- Aromatic Infusion: Sauté garlic and onion in a touch of olive oil for 1 minute. Deglaze with a splash of the chile soaking liquid to capture flavor.
- Concoct the Base: In a blender, emulsify rehydrated chiles, garlic/onion mixture, soaking liquid, cumin, oregano, salt, and pepper until velvety smooth. Blend for a long time so the sauce has an even consistency. Don’t overfill your blender, as blending hot sauces can be dangerous.
- Refine and Enhance: Taste, and adjust salt/pepper. For subtle complexity, stir in the optional dark chocolate. If too thick, thin with additional liquid. If it is thin, you can cook it longer to evaporate the water.
Note: Some people prefer to change the water before blending, and many New Mexicans don’t like using cumin and oregano. This is my way to make the sauce, feel free to copy it or change some stuff up.
For storage, pour it into glass, as red chile will stain plastic containers permanently. You can also scoop it into freezer bags and freeze it in blocks for later use.
How to Use Your Red Chile Sauce
- The Classic: Smother stacked enchiladas with this sauce, layering in your favorite cheese and filling for a quintessential New Mexican experience. Enchiladas are such a common use of a red chile sauce, that is it often called simply Enchilada Sauce!
- Carne Adovada: This is one of my favorite ways to eat red chile. It is basically stewed or braised shredded pork using red chile sauce to flavor it. This can be super messy, so don’t eat a carne adovada burrito it in the car.
- Morning Spice: Drizzle over huevos rancheros for a fiery, flavorful start to your day.
- Chili Champion: Build a hearty bowl of chili, using your sauce as the foundation for beans, meat, and vegetables. In New Mexico, our favorite “chili” is green chile and pinto beans, but our red sauce makes a fantastic base for a lot of meat and beans based dishes.
- Creative Dips: Thin the sauce with a bit more liquid for a unique, flavorful dip with tortilla chips. It can blend quite nicely with a jarred salsa or hummus too.
- Flavorful Marinades: Combine with a touch of lime juice and oil to marinate chicken or pork before grilling
- Red Chile Pork Posole: Making a hearty soup with nixtamalized corn is a great way to fill up and warm yourself up in the colder months!
- Red Chile Pork Tamales: This sauce is fundamental in making our classic New Mexican tamales. This is the perfect food for family get togethers like Christmas or Thanksgiving. Feel hungry, grab a tamale. Now you feel better.
- Bloody Mary Mix: For the drinkers, try a quick spoonful of this in your brunch Bloody Mary. It will open your eyes and wake you up, that’s for sure.
For more ideas, be sure to check out our recipes section!
Unique ideas for a New Mexican fusion
I’ve lived in 5 different countries including the US, and worked as a chef in a couple of them. During this time, I did a lot of experimentation with different flavors that can blend quite well.
Some interesting things I’ve tried to make a unique sauce:
Instead of soup stock, miso is an interesting choice for saltiness. It also makes an awesome ramen base. It reminds me of a time pre-covid when I made a red chile miso with blowtorched chashu and green onion. the flavor of smoke was amazing.
Using soy sauce or fish sauce instead of salt. These can make the sauce a bit funky, but it will pair quite well with strong flavored dishes. I wouldn’t use this for a red chile focused dish like enchiladas, but it is amazing in carne adovada!
Mix in a different type of chili sauce, such as Gochujang or Harissa to give the concoction a more full kick of chile flavor.
Mix in different peppers like chipotle, chile pasado, or pasilla. Also add in some dark chocolate or ground nuts like almonds or cashews. This can make a very New Mexican, Mexican mole sauce.
Health benefits of red chile sauce
Red chile sauce, made with antioxidant-rich chile peppers, packs a nutritional punch. Its key ingredient, capsaicin, has been linked to potential health benefits. These include improved metabolism, pain reduction thanks to its anti-inflammatory properties, and possible boosts to heart health. While enjoying its fiery flavor, remember that moderation is key, and a balanced diet with plenty of fruits and vegetables is essential for optimal health.
Enjoy your NM red chile sauce
Now you have a sauce that is equally important in New Mexican cuisine as our green chile sauce! Although you can get red chile sauce at restaurants year round, I feel that it is a more festive option than green chile. I eat red chile a lot more around the holidays, but I have green all the time. In case you are looking for an interesting way to try red chile sauce when visiting Albuquerque, I highly recommend a visit to The Dog House their red chile chili dog is one of the best hot dogs I’ve ever had.
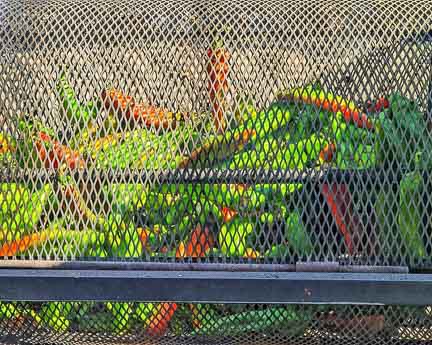
One of the best ways to make a red chile sauce is with chile that falls off your chile ristra. As the ristras get older, they become more brittle, and also occasionally are damaged by wind or other interaction with the physical world. Instead of throwing the chile away, save it somewhere, and use it to make a sauce. Chile ristras are delicious! Dried red chile pods are good for a few years, so eating your old ristra when you when you decide to refresh your decoration is a tasty and eco-friendly idea!

Hatch Chile Recipe Ideas: Beyond Traditional Mexican Dishes
When it comes to versatile ingredients, few can match the flavor and heat of Hatch chiles. These iconic peppers from New Mexico are known for their unique taste and are a staple in traditional Mexican cuisine. But did you know that Hatch chiles can be used in a variety of dishes, even those that are not typically Mexican? In this post, we’ll explore the versatility of cooking with Hatch chiles and share some delicious recipe ideas that go beyond the borders of Mexico.
1. Hatch Chile Mac and Cheese
Who doesn’t love a comforting bowl of mac and cheese? Take this classic dish to the next level by adding some roasted Hatch chiles. The smoky and slightly spicy flavor of the chiles pairs perfectly with the creamy cheese sauce. Whether you prefer a traditional mac and cheese or a more adventurous version with bacon and chile, Hatch chile will add a delightful twist to this beloved comfort food.
2. Hatch Chile Cornbread
Upgrade your cornbread game with the addition of Hatch chiles. The heat of the chiles and the sweetness of the corn create a perfect balance of flavors. Whether you bake them in a cast-iron skillet or as individual muffins, Hatch chile cornbread is a crowd-pleaser. Serve it as a side dish with chili or barbecue, or enjoy it on its own as a delicious snack.
3. Hatch Chile Burgers
Spice up your burger game by mixing some finely chopped New Mexico chile into your ground beef. The smoky heat of the chiles will take your burgers to a whole new level. Top them with melted cheese, avocado, and a Hatch chile mayo for an unforgettable flavor explosion. Whether you prefer beef, chicken, or veggie burgers, Hatch chiles are the perfect addition to any patty. For a more simple approach, just coarsely chop roasted chile and use it as a topping!
4. Hatch Chile Salsa
Move over, traditional tomato salsa! Hatch chiles can be the star of your next salsa creation. Roast and blend the chiles with some onions, garlic, lime juice, and cilantro for a vibrant and spicy salsa that pairs well with tortilla chips, tacos, and grilled meats. Whether you like it mild or extra hot, Hatch chile salsa will add a kick to any dish.
5. Hatch Chile Corn Chowder
Warm up on a chilly day with a hearty bowl of Hatch chile corn chowder. The combination of sweet corn, creamy broth, and smoky Hatch chiles creates a comforting and flavorful soup. Serve it with a side of crusty bread or tortilla for a satisfying meal. This chowder is a great way to showcase the versatility of Hatch chiles in a non-Mexican dish.
6. Hatch Chile Pesto
Give your pesto a spicy twist by replacing or blending the traditional basil with roasted Hatch chiles. The result is a vibrant and flavorful sauce that can be used in a variety of dishes. Toss it with pasta, spread it on sandwiches, or use it as a marinade for grilled chicken or fish. Hatch chile pesto is a versatile condiment that will add a kick to any meal. With this recipe, I recommend using medium chile, as hot or extra hot might result in something only superhot chile lovers will enjoy.
7. Hatch Chile Chocolate Brownies
Yes, you read that right – Hatch chiles and chocolate can be a match made in heaven. Add some finely chopped roasted Hatch chiles to your favorite brownie recipe for a unique and delicious twist. Another option is to use sun dried red chile powder instead of roasted chile. The combination of rich chocolate and spicy chile will surprise and delight your taste buds. These brownies are perfect for those who enjoy a little heat with their sweet.
These are just a few examples of the countless ways you can incorporate Hatch chiles into dishes that are not typically Mexican. The versatility of these peppers is truly remarkable, and they can add a unique flavor and heat to a wide range of recipes. So, the next time you’re looking to spice up your cooking, don’t forget to reach for some Hatch chiles. Your taste buds will thank you!
In case you are looking for more recipes than just these, be sure to check out our recipes section!

Hatch Green Chile Chicken Enchilada Recipe – Stacked and Rolled Enchiladas
Introduction
Looking for a delicious and flavorful New Mexican dish to spice up your dinner? Look no further! In this recipe, we’ll show you how to make mouthwatering Hatch green chile chicken enchiladas. Whether you prefer stacked enchiladas like a lasagna or the classic rolled version, this recipe has got you covered. Get ready to tantalize your taste buds! Make sure you come get roasted chile at 2010 Eubank Blvd NE in Albuquerque during the chile season!
Ingredients
- 2 cups cooked chicken, shredded
- 1 cup Hatch green chile, roasted and diced
- 1 cup shredded cheese (cheddar or Monterey Jack)
- 12 corn tortillas
- 1 cup green chile sauce
- 1/2 cup sour cream
- 1/4 cup chopped fresh cilantro
- Salt and pepper to taste
Stacked Enchiladas – Like a Lasagna
If you’re in the mood for a unique twist on traditional enchiladas, try making stacked enchiladas. Here’s how:
- Preheat your oven to 375°F (190°C).
- In a mixing bowl, combine the shredded chicken, diced Hatch green chile, and half of the shredded cheese. Season with salt and pepper to taste.
- Spread a thin layer of green chile sauce on the bottom of a baking dish.
- Place a layer of corn tortillas on top of the sauce, covering the entire bottom of the dish.
- Spoon a generous amount of the chicken and green chile mixture over the tortillas, spreading it evenly.
- Repeat the layers, alternating between tortillas, sauce, and the chicken mixture, until you run out of ingredients.
- Finish off with a layer of tortillas and top with the remaining green chile sauce and shredded cheese.
- Bake in the preheated oven for 25-30 minutes, or until the cheese is melted and bubbly.
- Remove from the oven and let it cool for a few minutes before serving.
Rolled Enchiladas – Classic and Delicious
If you prefer the traditional rolled enchiladas, here’s how to make them:
- Preheat your oven to 375°F (190°C).
- In a skillet, heat a small amount of oil over medium heat. Soften each corn tortilla by quickly frying it for a few seconds on each side. Drain on paper towels.
- In a mixing bowl, combine the shredded chicken, diced Hatch green chile, and half of the shredded cheese. Season with salt and pepper to taste.
- Spoon a generous amount of the chicken and green chile mixture onto each tortilla, roll it up, and place it seam-side down in a baking dish.
- Pour the green chile sauce over the rolled tortillas, making sure they are well-coated.
- Sprinkle the remaining shredded cheese on top.
- Bake in the preheated oven for 20-25 minutes, or until the cheese is melted and golden.
- Remove from the oven and let it cool for a few minutes before serving.
Serving and Enjoying
Once your enchiladas are out of the oven, it’s time to add the finishing touches. Serve them with a dollop of sour cream, a sprinkle of fresh cilantro, and a side of Spanish rice or refried beans. The combination of tender chicken, spicy Hatch green chile, and gooey cheese will make your taste buds dance with joy!
So, whether you decide to make stacked enchiladas like a lasagna or stick to the classic rolled version, this Hatch green chile chicken enchilada recipe is sure to impress. It’s the perfect dish to satisfy your Mexican food cravings and add some excitement to your dinner table. Give it a try and let your taste buds embark on a flavorful adventure!
For more ideas on what to cook with New Mexico chile, be sure to check out our recipes section!

A Classic Red Chile Pork Posole Recipe to Warm Your Soul
Introduction
Red chile pork posole is a beloved dish in New Mexico, especially during the holiday season. This hearty and flavorful soup is perfect for warming up on a chilly winter day. Made with tender pork, rich red chile sauce, and hominy, it’s a dish that will leave you feeling satisfied and comforted. In this article, we’ll walk you through a classic red chile pork posole recipe that will surely become a favorite in your household.
Gathering the Ingredients
Before we dive into the recipe, let’s gather all the ingredients you’ll need:
- 2 pounds of pork shoulder, cut into bite-sized pieces
- 2 tablespoons of vegetable oil
- 1 large onion, diced
- 4 cloves of garlic, minced
- 2 tablespoons of flour
- 3 cups of chicken broth
- 2 cups of water
- 1 cup of red chile sauce (made from Hatch hot red chile pods)
- 2 cans of hominy, drained and rinsed (1 cup of dried hominy soaked overnight)
- 1 teaspoon of dried oregano
- Salt and pepper to taste
- Optional toppings: chopped cilantro, sliced radishes, lime wedges
Let’s Get Cooking
Now that we have everything we need, let’s start cooking:
- In a large pot, heat the vegetable oil over medium-high heat.
- Add the pork shoulder pieces to the pot and cook until they are browned on all sides. This will help develop the flavors in the soup.
- Add the diced onion and minced garlic, and sauté until they become fragrant and translucent.
- Sprinkle the flour over the pork and stir well to coat. This will help thicken the soup.
- Pour in the chicken broth, water, and red chile sauce. Stir everything together and bring the mixture to a simmer. Some people like to leave the red chile sauce on the side. I recommend this if you have people in your family who are sensitive to spice.
- Reduce the heat to low, cover the pot, and let the soup simmer for about 1 hour, or until the pork is tender.
- Add the drained and rinsed hominy to the pot, along with the dried oregano. Stir well and let the soup simmer for another 30 minutes to allow the flavors to meld together. If using dried hominy, start boiling it while you are cutting onions and garlic. It will take about an hour of total boil time to reach the right texture. The time it will take depends on how long you soaked it.
- Taste the soup and season with salt and pepper according to your preference.
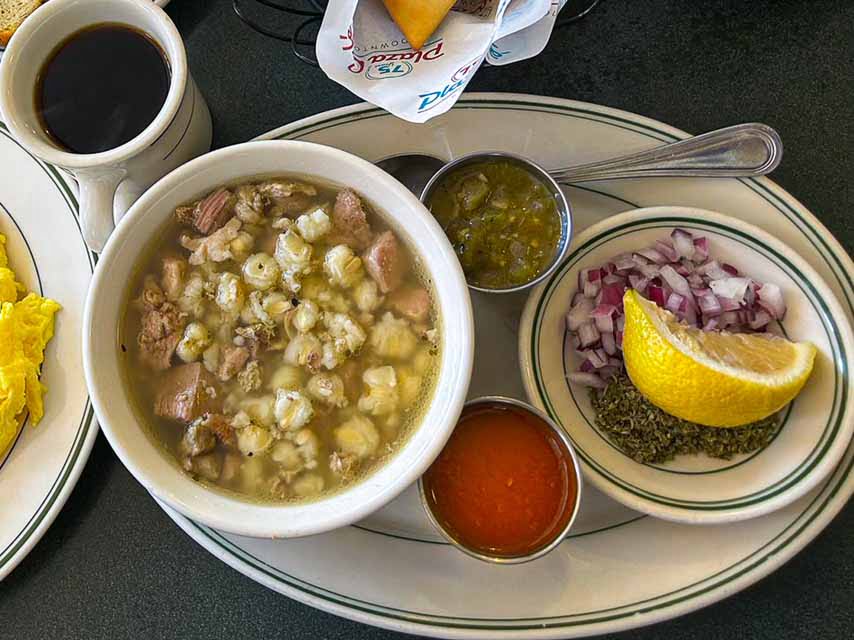
Serving and Enjoying
Your classic red chile pork posole is now ready to be served! Ladle the soup into bowls and garnish with chopped cilantro, sliced radishes, and a squeeze of fresh lime juice. These toppings add a burst of freshness and brightness to the dish, balancing out the rich flavors of the soup.
Enjoy this New Mexican-style posole with warm tortillas or crusty bread on the side. It’s a complete meal on its own, but you can also serve it as a starter or alongside other Mexican dishes.
Conclusion
Now that you know how to make a classic red chile pork posole, you can bring a taste of New Mexico into your own kitchen. This hearty and comforting soup is perfect for any occasion, but it’s especially cherished during the holiday season. So gather your ingredients, get cooking, and enjoy a bowl of this delicious red chile pork posole with your loved ones. Remember to stock up on red chile pods when you get your roasted chile for the year at 2010 Eubank Blvd NE!
In case you are thinking about other ways to use New Mexico’s favorite food, be sure to check out our recipes section!

How to Make a Delicious Chile Relleno: A Fried Stuffed Hatch Green Chile
Are you a fan of Mexican or New Mexican cuisine? If so, you’ve probably heard of the mouthwatering dish called Chile Relleno. This traditional Mexican dish consists of a roasted Hatch green chile pepper stuffed with cheese, dipped in a fluffy egg batter, and then fried to perfection. The result is a crispy, golden brown exterior with a gooey, cheesy center that is simply irresistible.
Choosing the Perfect Hatch Green Chiles
The first step in making a delicious Chile Relleno is selecting the right Hatch green chiles. Look for fresh, plump peppers that are straight, free of blemishes and have a vibrant green color. The heat level can vary, so choose according to your preference. Some like it mild, while others prefer a spicier kick. The best varieties of chile for a relleno are typically mild and medium varieties such as Big Jim or Numex 6-4. For those that want more spice, a great option is Miss Junie, which is nice and spicy, but also meaty and not much smaller than a Big Jim. Extra hot and hotter chile such as Barker or Lumbre can also work, but it will be a lot of work making enough rellenos to feed a family.
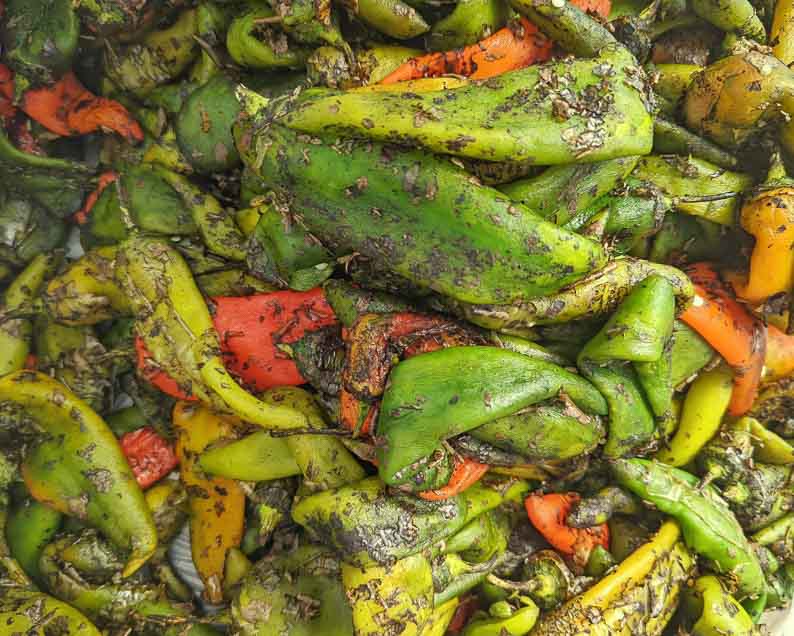
Roasting the Chiles
Roasting the chiles is an essential step that adds a smoky flavor to the dish. There are a few different methods you can use to roast the chiles:
- Grill: Preheat your grill to medium-high heat. Place the chiles directly on the grill grates and cook, turning occasionally, until the skin is charred and blistered.
- Broil: Preheat your broiler and place the chiles on a baking sheet. Broil them, turning occasionally, until the skin is charred and blistered.
- Gas stove: If you have a gas stove, you can roast the chiles directly over the flame. Use tongs to turn them until the skin is charred and blistered.
Once the chiles are roasted, place them in a plastic bag or a covered bowl for about 10 minutes. This will steam the chiles and make it easier to remove the skin. Alternatively, you can get us to roast a sack of chile for you during the chile season to save you some time!
Stuffing the Chiles
After the chiles have cooled, carefully peel off the charred skin. Make a small slit along the side of each chile and remove the seeds. Be sure to handle the chiles with care, as they can be quite delicate.
Next, it’s time to stuff the chiles with cheese. Traditional options include Monterey Jack or Oaxaca cheese, but you can also get creative and use a combination of cheeses like Cheddar, Queso Fresco, or even goat cheese. Gently stuff the chiles with the cheese, making sure not to overfill them.
Some people also like to sautee some meat like ground beef and add it to the filling. Alternatively it is not unheard of to stuff a chile relleno with Spanish rice. If you have a lot of chile available, don’t be afraid to be creative. Chile rellenos are hard to burn the filling, as the chile pepper is a great shield for whatever is inside.
Preparing the Egg Batter
The egg batter is what gives the Chile Relleno its signature fluffy texture. In a large bowl, separate the egg whites from the yolks. Beat the egg whites until stiff peaks form. In a separate bowl, whisk the egg yolks until smooth. Gently fold the beaten egg whites into the yolks until well combined. This will ensure that you have a lot of air bubbles giving the batter a light a fluffy texture.
Frying the Chiles
Heat oil in a deep frying pan or skillet over medium-high heat. The oil should be hot enough to sizzle when you drop a small amount of batter into it, but not so hot that it is smoking.
Take each stuffed chile and dip it into the egg batter, making sure it is coated evenly. Carefully place the battered chile into the hot oil and fry until golden brown on all sides. Use a slotted spoon to remove the chile from the oil and place it on a paper towel-lined plate to drain any excess oil.
Serving and Enjoying
Once the Chile Rellenos are fried to perfection, it’s time to serve and enjoy them. They can be served on their own as a main dish, or with a side of rice and beans for a complete meal. Top them with your favorite salsa or sauce, such as a tangy tomato salsa or a creamy avocado sauce. In New Mexico, we love to ask the question “Red or Green?” and this is no exception. If you want to put a green or red sauce on top of it or on the side, it is a great addition to this dish. It is also a good way to increase the spice level.
The combination of the crispy exterior, the gooey cheese filling, and the smoky flavor of the Hatch green chiles makes for a truly delightful culinary experience. So why not give it a try and impress your friends and family with your homemade Chile Rellenos?
Remember, making Chile Rellenos takes a bit of time and effort, but the end result is well worth it. So put on your apron, gather your ingredients, and get ready to create a delicious Mexican masterpiece in your own kitchen!
Tips to make spicy rellenos
If you are a spice lover, a chile relleno might not be the ideal food for you as it comes. The reason why, is that chile rellenos are best made with less spicy chile. If you find that the heat is not up to your preference, instead of changing chile varieties, I recommend using and extra-hot or hotter chile powder and incorporating it into your stuffing. This will raise the overall spice level of the dish while still allowing you to use a big, thick, and meaty chile. It will save you a lot of work, and I think it is a much better way to have extra hot chile rellenos without needing to make 5 per person.

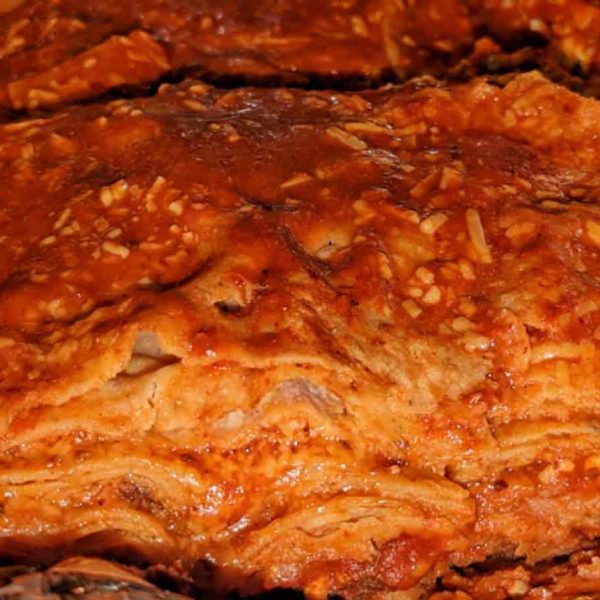
Red Chile Stacked Enchiladas
If you have ever been through New Mexico, or at least been to a New Mexican restaurant, odds are you have had enchiladas. Red chile, green chile, chicken, cheese, beans, mushrooms, vegetarian or vegan, they are delicious any way they come. Personally, I like recommending red chile over green for enchiladas, because I think the textures match, and the sauce is also easier and less work to make. In fact, if you have a chile ristra hanging, you can just pull a few chile peppers off the bottom and make it like that. Ristras are food after all.
Restaurant style enchiladas
Typically if you go to a restaurant, you will be served rolled enchiladas. Rolled enchiladas are a delicious treat, but somewhat harder to make in a home kitchen. One reason is that restaurants often have more resilient corn tortillas, which haven’t cooled down yet. When corn tortillas cool down after being made from masa, certain oils retract, and leave the outer edges prone to cracking and breakage. Unless you plan to make your own corn tortillas, which are delicious, but also labor intensive, stacked enchiladas are a great way to go.
Home-style stacked enchiladas
Think about a stacked enchilada in a similar way to a lasagna. You want the same type of deep pan. From there, layer corn tortillas and red chile sauce, along with your other ingredients. Bake at 350 degrees for about 20 minutes. If you are making a big, thick dish, cook it longer. That being said, this is an incredibly forgiving recipe. The corn tortillas will soak up the sauce, but not really get soggy. The water in the sauce also prevents it from really getting burned. If you cook it for an hour, you still won’t really destroy it. Because of that, have fun with it.
Different ingredients to use
As you can see, I have intentionally left the recipe very vague. With a red chile stacked enchilada, you will be working with a delicious New Mexico chile sauce, which works well with just about everything. If you like cheese, layer it in with the sauce when you are building your dish. The same goes with shredded chicken, pork, minced meat, or anything else. The main thing is to use meat that is in small and manageable pieces. If you use thick pieces of steak or chicken, then cutting through them will also end up destroying the structure of the enchilada. These things should be fork tender, so either use a tender pre cooked meat, or cut it into very small pieces.
Vegetarian and vegan options
If you are looking for a vegetarian way to make this dish, cheese and red chile has been a local classic for generations. You can also mix cheese with beans, mushrooms or other things. Mushrooms have a lot of water in them, so sauté them first in your favorite oil before building your enchiladas. Beans from a can typically have a good texture, but if you are cooking from dried beans, make sure they are nice and soft. Soak them, boil them, season them and give them a small mashing. It really helps bring the texture together with the corn tortillas. Nut based cheeses work pretty well in this dish, but an easy way to test is to simply mix a bit of your red chile sauce with the nut cheese. If it tastes nice, then it will be even nicer baked with some nice corn tortillas. I made a red chile hummus that was incredibly nice in this dish before. Something about sesame, cumin, and red chile really melded well together with the corn tortilla. Another nice idea is to use some chicos beans, just make sure they aren’t too wet!
Final comments
I worked a few years as a chef, but I never really blogged about it at the time. I know that my recipes aren’t terribly detailed, but I hope that you can take away some new techniques. I’ve always felt that rigid recipes mean boring food, and instead like to impart my cooking philosophy with what I write. This dish is one of the best ways to take a New Mexican classic and really make it your own. With red chile stacked enchiladas, you can take about an hour to make a meal for the whole family, and even have nice leftovers for lunch. It’s a classic soul food here, and I really hope you can share it with the people you love
Be sure to check out our recipes section for more ideas about how to use New Mexico’s favorite food!

Jhett’s New Mexico Green Chile Recipe
As enthusiasts from around the world gather for the Albuquerque International Balloon Fiesta, it’s the perfect time to celebrate with a local culinary favorite—the green chile sauce. Renowned for its unique flavor, roasted green chile holds a special place in New Mexican culture and has even spread its influence to places like Denver. Although you can make this recipe with frozen green chile, getting fresh roasted green chile during the chile season is ideal, as you can get exactly what heat level and flavor you are looking for.
Today’s recipe is mostly vegetarian and easy to make entirely plant-based by simply omitting or replacing the chicken bouillon powder. As a testament to green chile’s versatility, feel free to personalize the level of heat and other flavors to your liking.
Understanding Heat in Green Chile
Before we begin crafting our sauce, let’s discuss the spice factor. Green chiles come in a range from mild to extra hot. By blending different heat levels of chile or by adjusting the use of seeds, you can achieve your desired level of spiciness. Remember, seeds maintain their heat even after cooking.
For those handling hotter chiles, protective food preparation gloves are recommended. The capsaicin contained within can cause prolonged discomfort on your skin and can inadvertently spread, especially through frequent face touching. For gloveless preparation, regular handwashing with soap is imperative to avoid the potent sting of capsaicin. While unconventional, using vodka or olive oil could help in the removal process, soap and water remain the simplest and most hygienic solution.
Vegetarian Green Chile Sauce Recipe
With that guidance in hand, let’s get to the heart of our recipe.
Ingredients:
- 1 lb roasted green chile
- 1 medium onion
- 4 cloves of garlic
- 1 medium ripe tomato
- A strip or zest of lemon peel
- Low sodium soup stock (You can use Knorr brand bouillon for adjustability; both chicken and vegetable flavors are suitable)
- A small pinch of oregano
- A tiny touch of nutmeg and cinnamon
- Ground cumin (double the amount of coriander seeds used)
- A dash of paprika
- A couple of bay leaves
- Salt and pepper to taste
Method:
- Preheat your broiler. This is essential for peeling the tomato later.
- While the broiler heats, finely dice your onion.
- Place the tomato under the broiler until the skin begins to split, showing hints of brown or blackened spots—about 10 to 15 minutes.
- Meanwhile, chop the garlic—larger pieces to avoid burning, smaller for a stronger flavor—but watch carefully as it cooks.
- In a pan over medium heat with canola oil, season the onions with salt and pepper, cooking until translucent and just golden. Add the garlic and stir regularly to avoid charring.
- When the tomato is ready, set it aside to cool.
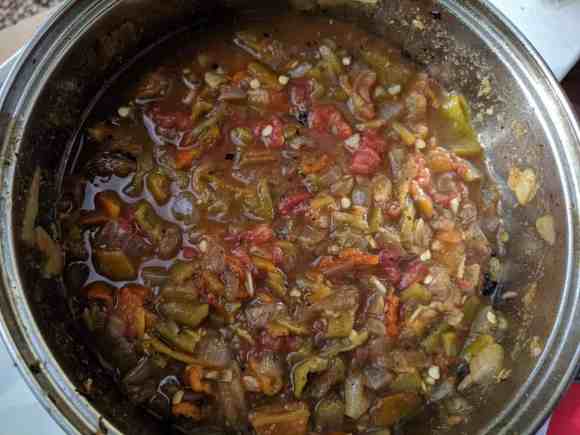
Time for Green Chile:
- Wearing gloves, remove the stem and peel from the chiles. Slice them open, scrape out the seeds, and chop into small pieces.
- Add the prepared chile to the pan with the onion.
- Turn your attention back to the peeled tomato. Dice it and add the flesh and any juices to the pan. Slice the remaining core to salvage all tomato pieces, discard only the very center stem, and add everything to your pot.
- Let the mixture simmer, stirring occasionally. Insert the bay leaves and lemon peel at this stage, allowing the flavors to meld over roughly 20 minutes.
- Begin seasoning with cumin, coriander, nutmeg, cinnamon, and paprika—spices can always be added, but never removed, so season with caution, tasting as you go.
- Once satisfied with the seasoning, turn off the heat and let the sauce sit for 10 minutes.
- Finally, remove the bay leaves and lemon peel. The flavors should now be perfectly married.
The Final Touch:
When seeking green chile or other related items, consider visiting my family business Farmers Chile Market. And if you have a beloved green chile recipe or adaptation, please share! I’m eager to hear how others enjoy this versatile ingredient.
With your green chile sauce ready, it’s time to savor the rich, complex flavors that New Mexico has to offer, alongside the beauty of the Balloon Fiesta. Enjoy!
Be sure to check out our recipes section for more ideas on how to cook with New Mexico’s favorite food!