If you want to know how to roast New Mexico green chile, or most chile peppers, look no further. If you have arrived here, odds are you got yourself a sack or box of chile from New Mexico during the relatively short Hatch chile season! You might be wondering to yourself, “How do I roast all this Hatch chile?” Whether you want to roast at over an open flame at home or are planning to roast professionally this year, read on to find out all about roasting New Mexico’s favorite ingredient, green chile.
Two ways to roast Hatch Chile
I wrote two primary ways to roast Hatch chile on this page, the first will be for how to roast at home, whether it is on the BBQ grill, an oven broiler, or on the stove. The second method will be targeted towards professional roasters who will be roasting using big barrel shaped Hatch chile roasters. Click down to our guide for professional roasters, but read the next section first to understand the overall process first. It works for both roasting at home and a chile roaster.
Understanding Chile Roasting
To begin with, we need to analyze what we want from the roast. In general, the purpose of roasting is mainly to peel the chile, with a smaller emphasis put on giving it a smoky flavor profile.
In order to peel a chile, it has to have a point where it peels FROM. That means you need a lot of direct heat on the chile to blister it. These blisters are fracture points of the peel, and where you can start to pull it off. From a more food science based perspective, the blisters form because of a pressure difference between the high heat of the peel and the cooler heat of the fruit inside the peel. Creating this difference causes blisters to form and then pop, which can then be peeled away from the chile. If the chile is already hot, your heat source is not hot enough, or something is lowering the heat level like water evaporating on the peel, blisters won’t properly form.
Use High Heat
So, step 1 is high heat, as hot as you can. This would be your oven’s broiler, a BBQ grill, or a blowtorch. Or you can be like me and have more than a few barrel roasters lying around. Those can blister a chile quite well, trust me!
You want to keep it on that high source of heat for about 3-4 minutes, but watch carefully. If you heat the chile for too long, it will burn, and the peel will turn to ash and stick back on the fruit. Blackening is good, and if a little more than half of a side of chile blackens, it is still ok. Too much more than that and you will risk burning the inside of the chile too.
Do I Need to Roast Hatch Chile?
Yes, you do. Although New Mexico chile is technically edible raw, I can’t think of a single New Mexican who eats it that way. The only time we have raw green chile is when we are sampling the heat level before committing to getting a full 40 lb sack roasted. The peel of our chile is very thick and plasticky, and the chile is quite thick and hard too. Roasting chile burns off the peel and tenderizes the fruit of the chile as well! When you factor that in with the delicious smoky flavor that roasting provides, the answer to this question is a no brainer! Roast your chile, or get someone to roast it for you. It’s worth it, trust me!
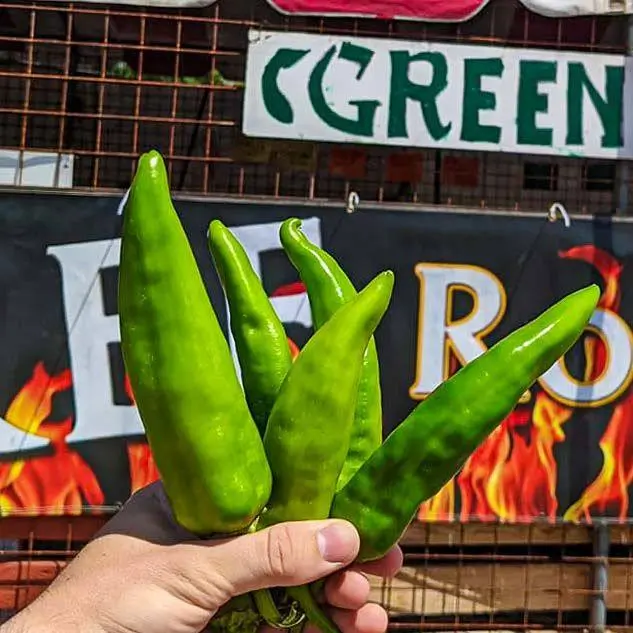
How to Roast Green Chile at Home
Preparing to Roast Green Chile
Prepare your roasting area, or your mise en place as chefs might call it. Odds are you have a lot of Hatch chile to roast, and will need to do it in batches. Get your chile all ready on one side of your roasting area, whether it is your oven, barbecue grill, blowtorching area, or a grate on top of a gas stove. On the other side, prepare an area to leave the chile to steam after it is roasted. Steaming is an important part of chile roasting that not only makes the chile easier to peel, but also makes the chile’s spice level more even.
Starting the roast
Give each chile a few pokes on different sides with a sturdy toothpick, a needle, or a fork. Because roasting at home typically doesn’t have rotation like a barrel roaster, it can lead to a pressure imbalance causing some chilies to pop. Poking a few holes allows gas to escape the chile, so they don’t pop. Don’t poke holes all over the chile, because it also allows water to escape the chile and run over the peel. This water will lower the temperature when it evaporates, and prevent proper blistering if there are too many holes. A few pokes in random areas should be enough.
Blister over high heat
After giving the chile a poke, it’s time to roast! Be sure to heat up your roasting element before you add the chile, so you burn the peel before too much water starts flowing out of the chile. Put your Hatch chile in the oven under high broil, on the barbecue over an open flame, or in a safe area to blowtorch. It all will roast well if your heat is hot enough. Let it sit on each side for about 3 minutes, then flip a single chile pepper to check for blackening. If it is about 50%, then it’s time to start flipping. If it is less than that, you might want to wait a little longer before flipping. Don’t be afraid of the peel turning black, the point of roasting chile is to burn that so it comes off!
Roast all Sides of the Chile
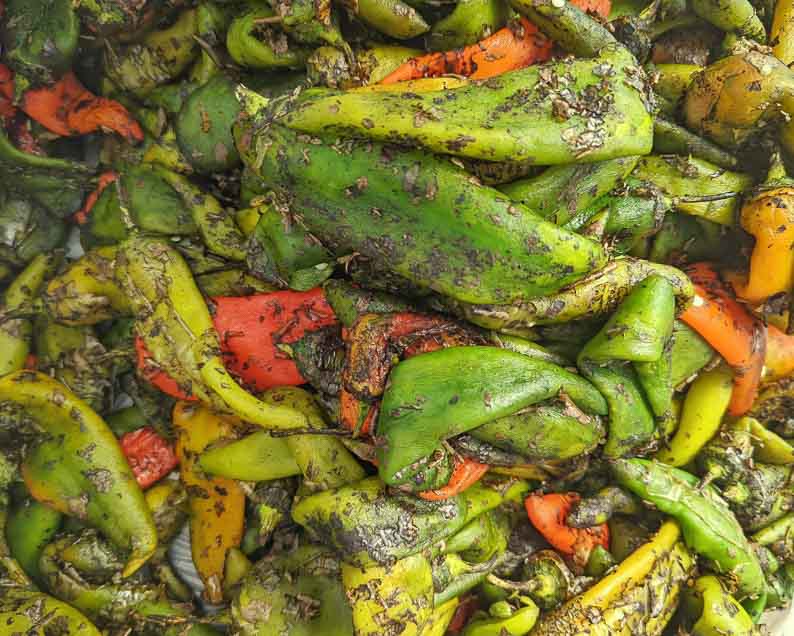
Flip it over, and do the same to the other side. Some chiles are more bell shaped and have more than 2 sides, just turn them over again. Once you blacken all the sides, put them in a bag or a bowl covered with a towel you don’t mind staining. Let the chile steam for a little bit to help the peel loosen and also let the heat of the chile mix together and standardize a little bit. You can also give it a dump in cold water to help loosen the peel also. The rapid change in temperature can help separate the peel even more, but this isn’t really traditional and may dilute the flavor a bit.
Peel Chile when you want
Every New Mexican has a different opinion on when to peel chile. Many people like to peel it before they freeze it, so they have less work when they are preparing a green chile sauce or a topping for a green chile cheeseburger. Other people prefer to peel chile after they freeze it, saying that it is easier to peel. Personally, I like to freeze with the peel on. The peel can help prevent the effects of freezer burn, and also leads to a more smoky flavor in your green chile! Be sure to read our guide to peeling chile!
Bag up your chile
Get a box of freezer bags, and bag up your chile. I recommend going for about 1 lb per quart bag, so it is easy to pull apart. When the bags are full to your liking, squeeze out as much air as possible and close the bags. Getting them airtight will help prevent freezer burn and keep your roasted Hatch green chiles looking and tasting great! Spread your chile bags out so they cool off faster, then put them in your freezer when they aren’t hot anymore. Don’t let them sit out too long for food safety reasons.
How to Roast Chile With a Barrel Roaster
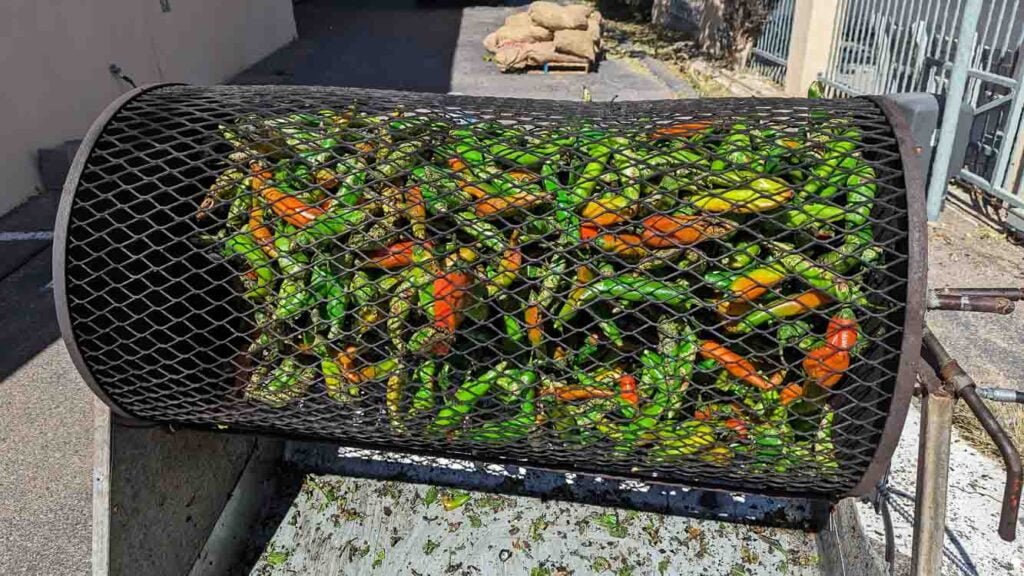
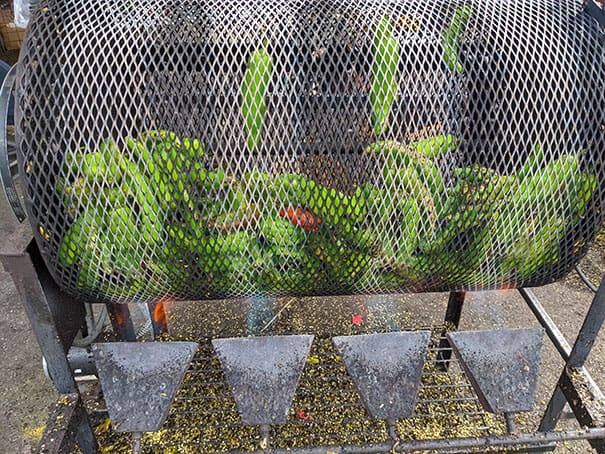
The vast majority of chile pepper roasters that roast for customers are made in a barrel shape. The barrel roasters are great, because they not only roast the chile, but the spinning peels them as well. In case you are going to be roasting chile at a grocery store, popup, or somewhere else this year, this guide can help you understand how to roast chile, make your customers happy, and make more in tips too!
Set up your Roasting area
Roast chile safely
Roasting green chile is dangerous, so it is your responsibility to ensure it is as safe as possible. Be sure to prevent trip hazards to the best of your ability. Check your gas hoses every day by using a spray bottle and soapy water. Check every connection, and the hose itself near the roaster and main propane tank. Be sure that your PSI regulator is set to the allowed level that your local propane authority allows. I keep 5 fire extinguishers at my chile stand, including 3 in the roasting area, one near the register, and one near the back. It is very important to have fire extinguishers nearby to quickly put out a fire. In case there is a problem at my chile stand, I know that I can have three different people each with fire extinguishers in mere seconds. Your chile roasting area should be set up in the same way. Fires happen, especially on windy days. In case it happens, don’t panic. Turn off the gas and calmly put out the fire.
Organize Your Roasting Area
Organize your different flavors of chile in a way that makes it hard to make mistakes. Keep the mild, medium, hot, and extra hot in the same place every time. Additionally, don’t put the mild next to the extra hot, so if you or a coworker does make a mistake, it is a smaller one. No one likes getting the wrong flavor of chile, but getting extra hot when you wanted mild chile is far worse than getting extra hot when you wanted hot. Everyone makes mistakes, but limiting the potential for mistakes will allow you to please more customers.
Starting the roast like a Pro
The first step is to put the chile in the roaster. Depending on the sack you use, you might need a knife or clippers to cut it open, as most farmers tie them with twine or use zipties to close the sacks. Put the chile in the roaster, pick out any burlap, tags, or rotting chile and close it up. Be sure to use proper protection during all steps, as it is easy to burn yourself on the hot metal of a chile roaster! Don’t forget to wear your gloves! We use both 18 and 24 inch welding gloves at Farmers Chile Market.
Turn Up the Heat!
The next step is to turn on the heat at full blast, then turn on the motor to spin the barrel around right after. I like to do this, as the high flame will cause a lot of small blisters to form on the chile for a second or two before the roaster spins. These blisters will certainly lead to easy to peel chile. I cannot overstate the importance of starting the chile roast at the highest heat you can. This is the single most important thing to do to ensure you have a good roast, as the pressure difference caused by heating the peel faster than the inside of the chile is how it separates.
Watch the Chile, Every Sack is Unique!
This step takes about 3 or 4 minutes, but every sack of chile is different. Smaller chile is more delicate and cooks faster, bigger chile cooks slower. Red chiles also cook slower, and green will often begin to burn before red starts peeling. The general rule is, the bigger and redder the chile, the longer this step takes. There are MANY variables though, so don’t take general rules as facts. If it is hot outside, chile roasts faster than if it is cold. It takes about 2-3 minutes longer for us to roast on average in October than if we roast in August. If it is windy, chile takes longer to roast too. Pay attention to every single sack of chile you roast, as a timer won’t tell you the whole story.
Turn the heat down and let it spin
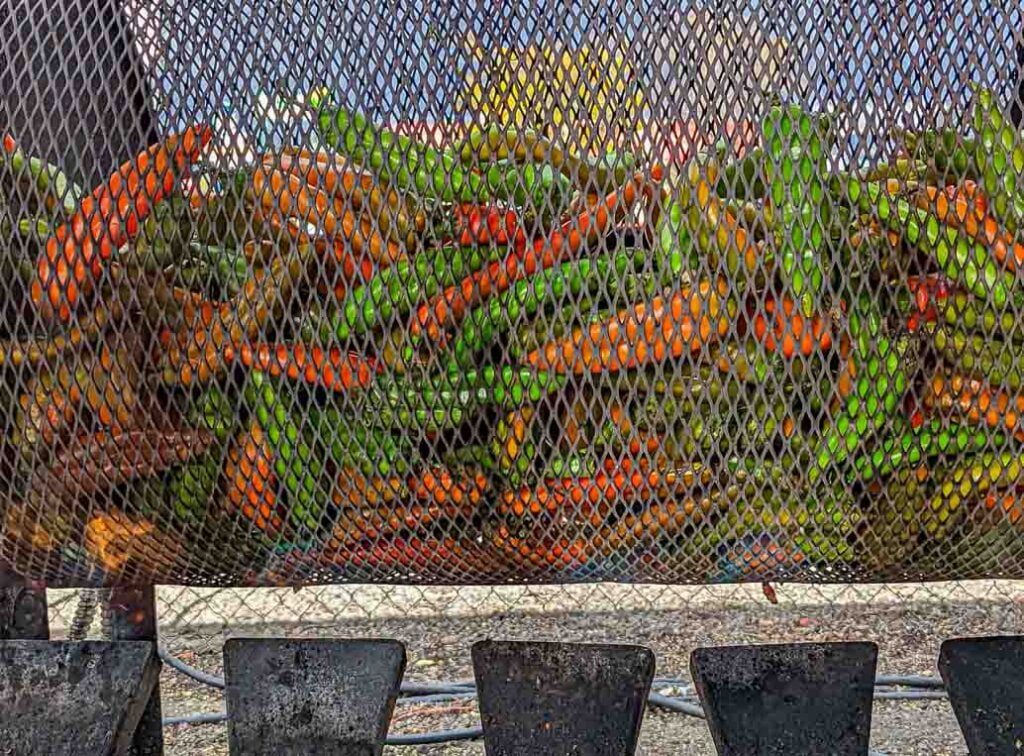
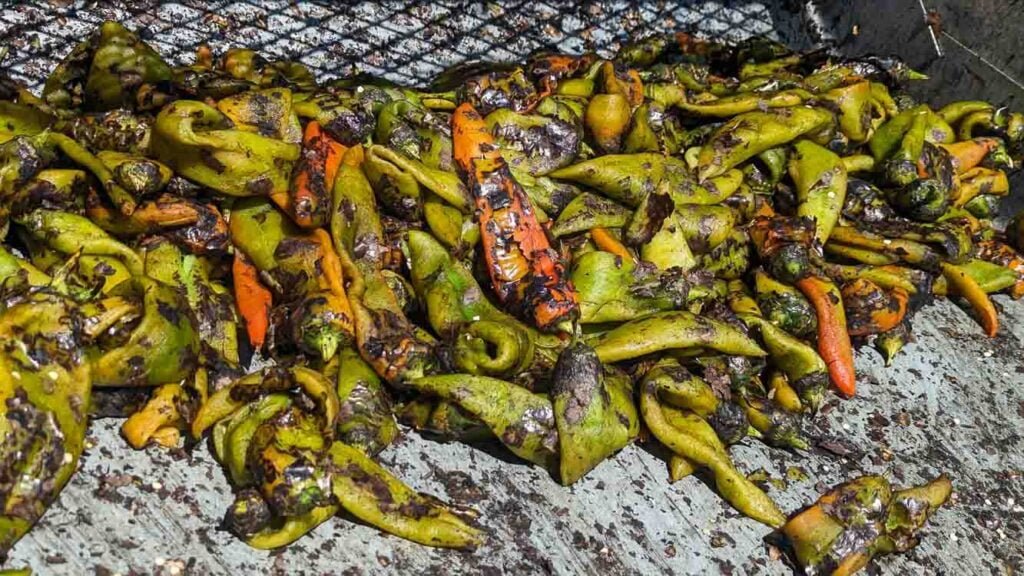
What I look for is most chiles should be fairly blackened, with the tips starting to peel before I turn the heat down. If you turn down the heat too early, the chile will cook, but the outside won’t be blistered enough to peel well. If you can see the tips of most chiles peeling, then it means you can turn down the roaster.
After turning the flames down to a low medium, let the roaster spin another 3 or 4 minutes. The friction along with the pressure from the fire will help peel the chiles without burning them.
If the peel is stubborn and doesn’t seem to want to come off, turn the heat back on high for about 20 seconds, then go back down. It will peel, some sacks just take longer than others.
Every sack of chile is unique and will roast differently. When I train chile roasters, I always explain this. The key factors are blisters, which lead to points where the peel separates from the fruit. This mainly happens early on in the roast process, as the juice will be flowing later on, lowering the temperature as it evaporates. Blisters need very hot temperatures in order to form, so start with full burn right away then lower the flame later.
If you start a roast well, it should be a good roast, just don’t let it get too black, and don’t spin it too long.
Dropping and bagging the chile
Make sure to clean off the chute of your roaster before you drop it from the roaster and bag it up, so the customer doesn’t get a bag full of excess chile peels. Put the chile into 2 bags, and pull it up in a way that squeezes most of the air out of the bag. Give it a spin, and tie it up.
Mark the Bags
In case your customer has gotten multiple heat levels, make sure to mark the bags properly. No one wants to get home and play a guessing game about what chile heat they got. Additionally, many people get multiple sacks at a time for different friends and family, and give them the whole bag on their way home. If the heat levels aren’t properly marked, it results in a less than optimal customer experience.
Go the Extra Mile
This is a personal request, please do everything you can to let people enjoy their New Mexico chile experience. If you aren’t slammed and can safely leave the roasting area, offering help to carry the chile out to a customer’s car also goes a long way! Chile roasters often get pretty decent tips, and going the extra mile for each customer can really help put more money in your pocket!
Visit us in Albuquerque
Although I may be biased, I think that visiting a chile roaster is a great travel idea. Whether you are trying to learn chile to roast chile in your kitchen because you love New Mexican cuisine, or you are trying to start a chile roasting operation in your hometown like me, there are plenty of things to see at a chile roaster. Although you will probably read this in the middle of chile season and might not have time this year, consider visiting New Mexico in the Fall sometime! It’s truly a great time to see and experience the flavor, culture, and events of the American Southwest!
If you are in Albuquerque during the chile season, feel free to ask how we roast. As long as it isn’t too busy, we would be glad to explain more. We are located at 2010 Eubank Blvd NE 87112 in Albuquerque. While you are there, I recommend checking out our large chile ristra selection too.
Comments
2 responses to “How to roast Hatch chile”
Hello
Do you do fresh roasted chilies everyday?
We roast chile every day from the first weekend of August to the end of October.